At the Quakertown Mart today, I ran across an amazing special. 45 pounds of chicken for $16.99.
Miss Inquisative, also known as Midget Cat, or "Half a Manx" for short, checked out the loot.
I gave half the box to my mom and dad. So they got 6 chickens, and Nick and I got 6 chickens. I packaged mine up in freezer bags. At the bottom of the box, I could see that Tyson had intended these beasts to end up as Rotisserie Specials.
Actually, I felt sorry for the beasts...dead and naked and eviscerated. I eat animals, but I do not take that lightly. These beasts,it seemed to me, were processed so quickly and so efficiently, it seemed wrong. So from the 6 I got, I took the first one and made Coq au Vin.
First, I cut up and sauteed 3 pieces of bacon. Then, I cut up the chicken. I am not too experienced at this, but with the instruction from Meat, a Kitchen Education, by Peterson, I did pretty well .
I simmered the bacon, three onions, some garlic, a bay leaf, some parsley and herbs de Provence mix, in the crock pot for a few hours.
And while I was at it, I used the back of the chicken, along with other trimmings, to make a stock. (Rear of the range). I am proud of the fact that I was able to de-bone the thigh, per Peterson's instructions. My pieces of chicken were not butcher-perfect, but they made this....
Pas mal. I used Malbec from Argentina as my wine. So good, and not expensive. This was melt in your mouth delish. For recipes, consult Julia Child or just do a internet search on "Coq Au Vin" and you won't go wrong. We served ours with brown rice and sweet peas. A sweet New Years' Eve dinner indeed!
Friday, December 31, 2010
Saturday, December 4, 2010
Mmmmm Sugar!
When Nick and I got married, his mom gave me a little blue notebook, The Bell Family's All Time Favorite Christmas Cookies. The book was compiled by his mom and his sister, Cindy. Cindy typed most of the recipes on white bond paper; some of them were Xeroxed from newspaper clippings. Cindy was a professional secretary, before people started to call them "Admin Assistants", "Executive Assistants", or (I hate this one, but I can't tell you why... "Admins".)
The book has several versions of Sugar Cookies, and I like this one best.
Here's the recipe (adaptations or comments by me in italics).
Sugar Cookie Cut-Outs (Tender Crispy Favorites)
3/4 cup butter or margarine (I always use butter. Butter is better.)
1 1/2 cups sugar (I sometimes use less...this amount makes them very sweet.)
2 eggs
1 1/2 teaspoon vanilla extract (I also add 1 teaspoon almond extract to this).
3 1/4 cups sifted flour (I measure 3 cups, and then sift that right into the bowl when the time comes to add flour.)
2 1/2 teaspoons baking powder
1/2 teaspoon salt (I usually use a bit more, as I usually bake with unsalted butter,and I think this recipe was probably designed with salted butter or margarine in mind).
With electric mixer, beat butter until creamy. (I use my KitchenAid stand mixer..and beat the heck out of the butter at this stage.) Beat in sugar and vanilla (and almond extract). Beat in eggs (I always put the baking powder and salt in before the eggs and beat the heck out of the mixture.) Gradually stir in dry ingredients (for me this is only flour...I add one sifted cup at a time, this time using the 'stir' function on the KitchenAid...no desire to get those gluten molecules kickin'! - best to keep them unspringy, so as to make for a more tender cookie.)
Chill three hours (in refrigerator, duh... I guess they felt they didn't need to tell you that...then again, sometimes when it's cold outside, I use my cold garage for cold storage...I wrap the dough ball in plastic wrap).
Roll to 1/4 inch thickness (I like them thinner). Cut with cookie cutters. Arrange 1 1/2 inches apart on cookie sheets (No way Jose...I put mine tight as soldiers in formation. These babies don't spread when heated, so no need to put distance between them.) Bake at 350 degrees F. for about 15 minutes. (I preheat my oven, of course, and bake about 6 minutes, then switch the sheets (top to bottom) and check frequently thereafter...usually mine are done in 10 to 12 minutes because I make mine thinner. Cool on racks. Decorate with frosting. (I don't use frosting. Instead, I sprinkle colored sugar crystals on the cookies before baking. My mom always did it that way, and that is what I do too.)
Saturday, November 20, 2010
The Root
I
Today was "clean out the garden" day. In the vegetable garden, I found treasures I had forgotten about. Decorative gourds (I don't know where these came from...some bird must have left the seed in early spring...), along with japanese turnips and carrots, which I had planted this spring.
The gourds ended up on the dining room table, keeping company with the ones I got last month from Hellerick's farm. The turnips...well, they were a bit bitter, so they ended up in the compost bin.
The carrots ended up here.
Parsley, sage, and fennel, all from my garden, with a little bacon fat from this morning's bacon, and salt. Baked at 375 degrees for an hour, they became this:
A good accompaniment to a roast, a slice of homemade lavash bread, and a glass of pinot noir!
Sunday, October 24, 2010
Beet, Carrot and Onion Soup with Garlic and Herbs
I have been wanting a Vitamix machine for some time. A few weeks ago, our old Hamilton Beach from the 1970s died. This is a machine that Nick brought to our marriage, 25 years ago, and he doesn't remember from where it came. It was probably one of those 'donation' items familiar to college aged-people - it goes like this --- grandma (or whoever) has two blenders, and gives you one of them. This blender was the only one we've ever had until now. I know it is an old blender, because one time, I toured Ike and Mamie Eisenhower's house (it's on National Park property) in Gettysburg, PA. They had the same blender Nick and I did, and Mamie died in 1979. (Ike died earlier).
Our Hamilton Beach died because I had some old parmesan cheese, and I was trying to use the blender to pulverize the cheese so I could sprinkle it on something I was cooking. You know the hard little bits of cheese you have left over from some long-ago culinary escapade? Not moldy, but hard. Well, that was the cheese I was trying to pulverize. The cheese, instead, knocked a hole in the plastic blender container, so that was the end. Besides, the Hamilton Beach was tired.
So, I debated for two weeks before spending a LOT of money (well, a lot by my standards) on a Vitamix.
This baby cooks. Literally! Mostly, I've been using it to make breakfast type smoothies (I experiment with flavors and textures I think will work). This morning, I tossed in 5 frozen strawberries, a half banana, about 10 dried cranberries, 2 oz each cranberry and orange juice.
So at lunch today, I made some soup. Just thought the recipe up as I went along. This machine is so powerful that ingredients COOK through pure friction. Friction is so powerful if you let the machine run long enough, that the ingredients get almost boiling hot, and steamy.
Beet, Carrot and Onion Soup with Garlic and Herbs (serves 2)
1 large beet, peeled and roughly chopped.
1 carrot, same as above.
1 small onion, same as above.
1 clove garlic, same as above.
2 sprigs parsley. 2 more, reserved for garnish.
1 large sage leaf, 2 small ones in addition, reserved for garnish
1 cup chicken broth.
2 T sour cream(for garnish).
Put all ingredients except for sage and parsley garnish, and sour cream into Vitamix. Whirl that baby. Bombs away...the cat scuttles out of the kitchen due to jet-engine noise simulation.
Let pulverize for 5 to 7 minutes, until liquid is steaming. (hot). Watch the liquid go up and down and round and round. Hypnotic red-orange color. Beta carotene and good stuff is practically transluscent in the autumn sunshine.
Pour into bowls and garnish with sour cream and herbs.
Although this was good, it wasn't fantastic. A little 'raw' tasting. Next time, I will soften the roots and garlic in a tablespoon olive oil on stovetop first. A little conventional cooking and carmelization would take this food from good to fantastic.
And if you conventional cook the ingredients before blending, you could make this soup with a regular (non Vitamix) machine.
Sunday, October 17, 2010
French Onion Soup
Years ago, I bought a set of four ovenproof bowls, at a factory outlet store in Flemington, NJ, with the idea that I'd make french onion soup. Eight (or so) years later, (yay) I made it!
My first French Onion soup!
It's not hard to make, which makes me wonder (as I do from time to time) what took me so long!
There is some time involved, mainly in making the caramelized onions that serve as a base for the soup. This step turns out to be easy if you use a crockpot.
Caramelized Onions
Peel, cut in half lengthwise, and slice (getting rid of the roots) about 5 pounds onions. I used regular (huge) NY "Bold" onions (the usual kind, not the sweet ones).
Throw these onions in a large crockpot with 1 stick butter. I used salted butter, so did not add salt.
Cook on low 14 hours. Cool and store in refrigerator, where they keep for weeks. Add salt later, as you use them, if you want. These will be beautifully brown and naturally sweet. But if you think they're not sweet enough, just add some sugar. I've been making these onions for a while.
These onions are great more than making soup. Use them for topping hamburgers, serving alongside any beans or meat, baking on top of a pizza, and so on. At our house, we can go through a batch of these onions in about 2 or 3 weeks. And it's just the two of us.
French Onion Soup
Take about 1 cup of caramelized onions from the fridge. In a pan, melt 1 T. butter, and put in about 1 T flour. Make paste, and heat about 4 minutes. Don't let burn. Whisk in about 3 cups stock of your choice. I used a combination of frozen chicken stock that I had on hand supplemented by water and Penzey's "broth in a jar". This Penzey's stuff is phenomenal, in my opinion. In fact, I buy a lot of my spices and such at Penzey's. My mom turned me on to Penzey's a few years ago. What I don't buy at Penzey's, I buy in ginormous bulk quantity at Costco. Put a few drops of Worcestershire sauce and simmer a while. Put the onions in. All told, simmer about 1 hour. Put pepper and salt in if desired.
Meanwhile, slice french bread into 3/4 inch slices (I made some yesterday) and toast it in the oven at around 325 degrees, basting if desired with olive oil.
Get your oven proof receptacles (I used my little bowls). It's nice to make individual type servings, but you can do it in one huge bowl, I guess, and serve it from that. For the individual servings, pPut 1 slice of bread in bottom of bowl. Put on some cheese (I used mozzarella and parmesan because that's what I had on hand but per Julia Child, you're supposed to use gruyere and or swiss with parmesan). Ladle soup on top. Float about 2 slices of bread on top of each bowl, put on more cheese, then drizzle with olive oil (again, learned from Julia Child). Bake at 325 F. for about 25 minutes. This temp browns the cheese nicely, but is not so hot that your soup boils in the oven.
Nick said this soup was as good as any he's ever had in a restaurant. That's good enough for me!
Sunday, August 22, 2010
Gad-Zukes!
Anyone who has a vegetable garden inevitably grows Zucchini at least once. I grow it every year. One plant yields a few squash every week. I looked away for a few minutes, and was greeted yesterday by a large one. About nine inches. We normally eat them when they're 4 inches long or less. I don't like them 'alone' when they're that big. So, when faced with a large one, there's always the option of Zucchini Bread.
My mother-in-law, Carol, gave me two family recipe compilations when I joined the family. One of these is a Christmas Cookie book. The other is a blue loose leaf binder, into which she had affixed some of the Bell family favorites. The recipes were painstakingly typed onto loose leaf binder paper.
Along the way, she noted my interest in vegetable gardening, and accordingly, my prolific zucchini harvest. So she gave me several Zucchini recipes, which I added to the binder.
This is one of them:
Zucchini Bread With Dates ("Good", she notes, in pen, on the upper left margin)
My changes are in italics to the right of the ingredients.
3 eggs
1 c. oil (I used only 3/4 cup peanut oil. it worked well. less fat.)
1 tsp vanilla
3 c. flour
1 tsp. baking soda1 tsp. cinnamon (I used 1 1/2 tsp.) 2 c. grated peeled zucchinni
2 c sugar (I used 1 cup sugar and 1 cup Splenda artificial sugar.)
1/2 tsp. baking powder (omitted)
1 tsp. salt
1/2 c. walnuts (I used 3/4 cup grated coconut instead of nuts.)
1/2 c. dates (I put in 3/4 cup.)
Directions:
Beat eggs until light and foamy. Add sugar, oil, zucchini and vanilla. Mix lightly.
Add flour, soda, baking powder, salt, cinnamon. (Recipe says to mix these separately then add, but I just dumped them in.)
Blend. Add nuts (coconut) and dates.
Pour into two greased and floured (I omitted the flour - no sticking, no problems) bread pans.
Bake in preheated 325 F degree oven about 1 hour. (I baked 55 minutes.)
Can be frozen. (I froze one loaf. The other is almost gone. It may not last 24 hours here at the Bell house!)
Sunday, July 11, 2010
Mom and Dad's Barnegat Bay Flounder and Potatoes
This year, the bay is full of large flounder, so when we go to the shore, we often have fresh fish. We catch them in the channel right outside my parents' house.
My mom has a way of pan cooking filets which works really well. First, wet the filets in beaten egg. Then, dip them in corn flake crumbs, mixed with a small bit of Old Bay seasoning. Now, pay attention - following is the secret.
Once the filets are coated in the crumbs, put them in the refrigerator for about 20 minutes. This firms up the crumbs, and keeps the crumb coating from coming off when frying later.
There are two secrets in frying. Use medium heat, and take the filets out of the pan right BEFORE you think they are done. Also, use a combination of peanut or canola oil and butter. You don't need much oil or butter, really.
My dad planted Yukon Gold and Redskin potatoes (both varieties) in the side yard, in a small patch near the house. They are ready to be eaten as thin skinned, new potatoes. We simply boiled them whole, and tossed them with butter, chopped parsley and a bit of dill along with salt and pepper. This made a a perfect bayside dinner, served along with green salad and coleslaw.
Below, mom and dad are standing in front of a photo of pound boats. These boats were used on Long Beach Island in the 'olden days' to net fish in the ocean. The boats were sail and oar powered. When my dad was a child in the late 1940s and 1950s, he used to go up to the beach to see the pound boats land with their catches of fish.
Monday, July 5, 2010
American Apple Pie
Apple season has begun! One of the earliest varieties is Yellow Transparent. I was lucky enough to get some of these apples from my mom and dad, who have a tree. I don't ever see this variety for sale in markets - even the small roadside apple stands. The apples we have bruise easily, and I imagine this is one reason we don't see them in markets (hard to transport when they bruise so readily.)
This is an early yielder, and the apples ripened two weeks ago.
Nick and I ate the pie with vanilla ice cream.
This is an early yielder, and the apples ripened two weeks ago.
Nick and I ate the pie with vanilla ice cream.
Sunday, July 4, 2010
Independence Day Potato Salad
Today is American Iindependence day. For our celebratory picnic, I made a 'french style' potato salad. Why French? In my opinion, without the ready assistance of the French (including Lafayette) and others (including genius battlements engineer Thaddeus Kosiuszko), the United States may not have been able to break free of the mother country. Of course, the americans had to want it bad enough to fight. Hard. Without blood and sweat from the famous and obscure Americans, the United States would simply not have been formed. Today I remind myself that american independence was not a 'given' back in 1776. At the time the Declaration of Independence was written, half of American colonists were still loyal to Britain. Those who wanted independence wanted it badly enough to stake their lives and fortunes on it's successful outcome.
Our country still operates on ideals that are emulated by and envied by many in the world today. May we americans always be worthy -- in our actions, thoughts, and aspirations -- of the ideals and actions of our forefathers and foremothers.
So again, chapeaus off to the French, for helping us out back in the 1770s (and later, when we fought the British again in the early 1800s). To honor the French contribution to American Independence, I made today an adaptation of what Julia Child calls a "French Style" potato salad.
This is a simple recipe, and I'll share it here, but credit Julia for the inspiration. First, you have to start with the best possible ingredients, as this is a simple recipe and the quality of the ingredients "make" the meal.I bought some new potatoes (by "new" potatoes, I mean those of this season, freshly dug) last Thursday from a farmer who is in Philadelphia every week. I've mentioned him earlier here, and he and his mom, and sometimes others, are in Suburban Station (SEPTA) every Thursday.
These potatoes, and some fresh garlic chives and parsley from my garden, along with some red wine vinegar, salt, pepper and good quality olive oil are all I needed.
"Thank the French" Independence Day Potato Salad
8 to 10 ounces new redskin potatoes
1 teaspoon salt (plus more if needed)
a few grinds of pepper
2 tablespoons red wine vinegar (more or less)
2 tablespoons olive oil
3 tablespoons chopped parsley (or less if you don't like this herb as much as I do)
2 tablespoons chopped garlic chives (or anything from the allium family -use your judgement)
Wash potatoes well, scrub a bit under running water. Cut into 1/4 inch slices (do not peel).
Boil for about 10 minutes (maybe less ) in salted water. Drain. Retain about 1/4 cup of the cooking liquid. Put that and the potatoes back in the cooking pan. Let sit for about 5 minutes, covered.
Take potatoes and water out, and put in large mixing bowl. Lightly mix in vinegar herbs and pepper. Let sit at room temperature another 10 minutes (Covered). Taste and add more salt or pepper if needed. Add olive oil. Toss. Let cool. Transfer to refrigerator. Ready to serve in 2 hours.
Sunday, June 13, 2010
Barnegat Bay Flounder
This weekend, we caught some beautiful flounder, in Barnegat Bay, and tonight Nick and I had some filets for dinner.
My sisters, their families, and Nick and me, along with my mom, celebrated dad's 69th birthday yesterday at my parents' vacation home on Long Beach Island.
Dad is a master filet-er. I have taken lessons, and I can approximate his technique, but my filets are ragged. I save the fish frames to make stock. Although Julia Child says to add the heads as part of the fish frame/stock combo, I don't have it in me, so the heads, along with the innards of fish, go to the laughing gulls and herring gulls who congregate at our dock when the fish come home.
As Dad is a master filet-er, my Mom is the Mistress of fine cuisine. Mom cooked dinner, after dinner, after dinner when I was a child, every meal from 'scratch' and every meal a feast, from salad to entree to dessert. From her I learned how to bake the filets with butter, lemon juice, salt and pepper, with a little flour (a la meuniere, s-il-vous plait) sprinkled on top. Served with sauteed spinach (with garlic and red pepper) and pasta, it made a beautiful dinner.
Tuesday, June 8, 2010
Steak and Spinach Salad
Yesterday was Nick and my 25th wedding anniversary, and to celebrate, we went to our neighborhood restaurant, The William Penn Inn. Nick ordered the "Prime Rib" and I had the "Penn's Surf and Turf". So, we are having leftover steak and prime rib for a few nights.
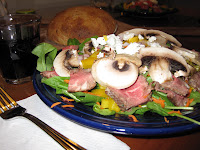
Tonight, my leftover filet mignon served as a savory foil to a spinach and mushroom salad (with carrots, onions, goat cheese, and yellow peppers). Served with homemade bread and a nice shiraz, this dinner was a good end to a challenging day.
Here we are last night at our anniversary dinner.
Sunday, May 9, 2010
Ooo laa, laa, Hollandaise!
Barnegat bay flounder, with capers, "New Jersey Fresh" Asparagus and Hollandaise.
The Hollandaise sauce recipe is from Julia Child. Bless that woman for making classic sauces NOT intimidating. With the help of "The Way to Cook", I whipped up that sauce in plenty of time to serve it with lightly sauteed flounder (from the freezer - sauteed in butter and olive oil, with capers and lemon juice added at the end) and microwaved asparagus.
Hollandaise Sauce (rough directions adapted from Julia) (makes 1 cup)
In heavy saucepan, whisk 3 egg yolks until light yellow. Add 1 1/2 T lemon juice. Put on low heat. Add 1 TB butter. Whisk over heat. When egg yolks get thick, add another 1 TB butter and keep whisking. Take off heat. Then add more melted butter (about 1 stick's worth) a few dribbles at a time,whisking constantly. The sauce will stay emulsified, absorbing the extra butter. Add salt and pepper to taste, and more lemon juice if you like. Keep warm. Spoon that goodness over what you like. That's it!
Saturday, May 1, 2010
B's Egg Thing
I adapted a "Crustless Quiche" recipe, which I got from my mother-in-law, Carol, many years ago, so that Nick and I could have a quick and easy dinner. The recipe from "Ma Bell" was supposed to feed 12 to 16 people, and included a lot of butter and significant amounts of cheese. My version is slightly leaner, and feeds four (or two hungry mungries - Nick and Me):
B's Egg Thing
Ingredients
4 eggs - beaten.
1/2 cup milk
1/2 cup (or so) cottage cheese (I had some laying around and scraped out the container for this)
1/2 teaspoon each, salt, baking powder, and sugar
1/4 cup flour
1/2 cup shredded cheese (I had an old piece of parmigiano/reggiano, so I used that, along with some fontina, to make 1/2 cup)a pinch garlic powder
6 grinds black pepper
Instructions
Take a casserole dish (that holds about 1 quart), and melt 1 tablespoon butter in it, in the microwave. Smear the butter around to coat the dish.
Preheat oven to 400. (f)
Beat eggs, then add all other ingredients. Put into casserole dish.
Bake until done - around 1/2 hour, or until a knife inserted comes out clean. Basically, you're making a thick custard/pudding.
I served it with homemade rolled biscuits and a salad.
Since I rode my bike 14.1 miles today at a speed of about 12 miles per hour, it was an easy first ride of the season, but I'm pretty tired right now. I work out regularly with weights, and I run and walk, but biking uses different muscles. I understand from those who "know" that when recovering from muscle exertion, one should eat protein and carbs, and this egg dish with biscuits has plenty of both. And the salad (mesclun greens), provides the green nutrition.
I am riding the American Cancer Society "City to Shore" ride (60 miles or so) in July,and I'm also riding the Lutheran Charities Ride in late June. I am not sure how many miles I will ride in late June - either 35 or 50 plus. I find that having a specific goal, fitness-wise, helps keep me on track.
Saturday, April 17, 2010
Calzone
Using a simple pizza dough and some simple ingredients for the stuffing, I made two very large calzones for dinner.
INSIDE THE CALZONE - STEP 1
Last night, I made a pasta topping consisting of sauteed onions, peppers, and italian sausage meatballs. (To make the meatballs, remove italian sausage from casing, wet hands so the mixture does not stick, then roll into balls and fry.) I made enough to have extra for tonight's calzone dinner.
THE BACK STORY
Nick and I mulched the garden today. We had 5 cubic yards of mulch delivered at 7:45 AM. By noon, the mulch was spread. So we felt we 'deserved' a good dinner. You know what I mean?
The DOUGH
Back in 1986, Cosmopolitan magazine gave this recipe for pizza crust. (I know - wierd that COSMO would talk about Pizza crust. but this was the 80s.) Here is the recipe, which I used tonight for calzone dough.
3 cups flour (Cosmo said regular flour - I say bread flour)
1 cup water (COSMO said 1 cup, I say 1 1/3 cups)
1 Tablespoon yeast1 Tablespoon salt
3 Tablespoons olive oil
Mix it all together. Knead, let rest.
I used half of this recipe for the calzones. The rest I refrigerated, to use tomorrow, for dinner (an italian type loaf.)
INSIDE THE CALZONE - STEP 2
I put the "Step 1 " ingredients in rolled out dough (two 12 inch circles, which was half the recipe above) then I added 1 package frozen chopped spinach, thawed and drained, and 1 cup shredded mozzarella. I divided the ingredients among the two calzones.
MAKE THE CALZONE
Then, I flipped the dough over so that the ingredients are inside the calzones. I pinched the edges together, then slipped the calzones into a 400 degree F oven. I use a stone in my oven, but you can simply put them in on a cookie sheet.
Then...
BAKE (around 25 or 30 minutes) and ...EAT (the best part).
Sunday, April 4, 2010
Simple but Yummy Easter Breakfast
I always like to make a little something special for Easter breakfast at our house, even though it was just Nick and me this morning.
On the menu - homemade cinnamon rolls, dyed hard-boiled eggs, orange juice, and coffee.
Hard Boiled Eggs
How simple it is to boil an egg, yet I want to share with you a great way to do this homely task, because I think it works really well, and until recently, I didn't know how great a result this would bring.
Start with cold water. Put it on heat, and put the eggs in while still cold. This prevents the eggs from cracking. Bring the water to a boil, actively simmer for about 1 minute, then turn the heat off. Let the eggs sit in the water for about 10 minutes. Drain, cool, and that's it! No green 'ring around the yolk' if you do it this way. My brother-in-law Ken gets credit for teaching me this method.
It being Easter, I dyed the eggs. Using the concept of 'resist' (familiar to all of us who grew up in the 60s and 70s in the form of 'tye dye'), I cut shapes of electrical tape, applied the tape onto the eggs, and then put them in the dye bath. The dye I used was very simple. McCormick food coloring, water, and vinegar. The food coloring at our house I bought back in 1986, and I have just run out of the red. I still have green, blue, and yellow, as part of the original box. A little food coloring goes a long way!
Cinnamon BunsThis is a long-standing recipe, which I make on New Years Day, Christmas, and Easter. I use the bread machine, on the delayed timer. This involves putting a raw, cracked egg into the machine, and letting sit overnight, and there are warnings against this (health caution), but I've never had a problem. Maybe it's because I use ice cold water, into which I put the egg. Water, egg, and the rest of the ingredients sit all night in the bread machine, which is set on the dough setting. When I wake up, I roll out the dough, put nuts, sugar, cinnamon and butter onto the dough, then roll it up in a cylinder. Cut the cylinder into bun-sized pieces, and put into a buttered pie plate to rise. Bake at 350 degrees, for about 30 minutes, let cool 10 minutes, and get ready for some serious noshing!
Here's what I put into the bread machine:
1 broken egg (no shell, of course)
a little less than 3/4 cup ice cold water
2 1/2 cups high gluten flour (bread flour)
2 tablespoons butter
1 teaspoon salt
2 tablespoons sugar
1/2 tablespoon yeast
Here's what I put on the rolled out dough before I roll it up:
1/2 cup walnuts
3/4 cup brown sugar
1 tablespoon cinnamon
1/2 cup butter, softened
I also happened to have some leftover crumb topping for muffins, which consisted of oatmeal, sugar, and cinnamon. I threw that in there too.
These are "more or less" measurements. It's not important to be exact. In my case, I had some butter that Nick had attempted to soften by sitting it on top of the radiator a few days ago, and it quickly had puddled into liquid. I used that in the cinnamon rolls, because it was no longer viable to use as regular butter, and I didn't want to waste it!
Whatever holiday(s) you celebrate this spring, happy celebrating!
Friday, March 26, 2010
Cheese Souffle
Tonight, Nick and I had fresh asparagus and a cheese souffle for dinner. This is my very first, ever, cheese souffle. I used my grandmother Eleanor's glass baking dish. Not ideal for a souffle, as the sides slope outward, so my souffle did not rise significantly, but it did rise. Besides, I did not have a souffle dish small enough for my two person version. Ok, I will say that this recipe was supposed to serve four, but it served two. At our house, we eat a lot.
I turned to Julia Child for the recipe. I used the one in The Way to Cook. Here's the basic method.
Separate the eggs. I used five eggs. Make a thick bechamel sauce, with 2 1/2 tablespoons butter, 3 tablespoons flour, and 1 cup milk. Add a bit of salt, pepper, paprika, and nutmeg. Whip the egg whites to stiff peak. After the bechamel cools, add the egg yolks. Then, fold the egg whites into the bechamel mixture, along with the cheese. The recipe said to use 1 cup of shredded cheese, but I used about 3/4 cup. Put into your buttered, prepared dish, then, put a collar on the dish, so the souffle has something to rise against, once it elevates itself in your oven. The oven is preheated to 375 F. Bake for around 35 minutes. My souffle was a bit weepy in the center, but that was not a bad thing, I don't think. Reminiscent of an omelet baveuse.
I served the souffle with a Pinot Grigio, a salad, some whole wheat bread (I used the basic whole wheat bread recipe from this book), and asparagus from California. I bought the asparagus today at the Reading Terminal Market, in Center City Philadelphia. Wow. $1.49 for a beautiful huge bunch! How great is that price? I read earlier this week, I think in The Wall Street Journal, (which I read every morning while commuting on SEPTA) that Asparagus is coming in huge quantities, thus the price, which is a full dollar lower than I am used to paying. So right now, I'm congratulating myself, thinking we ate pretty well at Chez Barbara. AND there's more! It took only about an hour to make this dinner, and it was all 'from scratch'. (I left work 1/2 hour early tonight, which gave us a head start on the deal.)
Sunday, March 21, 2010
Getting to the Root
Root vegetables are comforting. I think I'm genetically coded at the most basic level to say "yes" and "good" when it comes to foods that store well and taste good. All I know for sure is that I like root vegetables. Potatoes. Carrots. Parsnips. Turnips. Onions. And so on.
Spring has come to the northeastern US, and there are still no green vegetables above the ground. Even the alliums are silent. But what we do still have are the root vegetables, noble sorts, who have kept well over the past hard and cold months of snow, ice, and rain.
Every Thursday evening, I stop to visit at a farmer's stall. He is from Lancaster County, Pennsylvania, and every Thursday, he's at Penn Center/Suburban Station, in downtown Philadelphia. He sells in-season produce and beef. He also sells free-range eggs (from happy chickens, my mom, Anne, would say). I buy from him. He's Daryl, from Rineer Family Farms. I like to support those who put heart and soul into the food they produce for sale.
This past Thursday, I bought beets, carrots, parsnips, and eggs. This post is about beets and carrots.
Carrot salad is a comforting food. Some like sweet, mayo laden carrot salad. I like mine more piquant. So here's a carrot salad I will serve tonight. I made up this recipe, and I'm not an expert. So feel free to experiment yourself!
Barbara's Carrot Salad
1 pound carrots, shredded.
1 lemon, squeezed.
1 small apple, chopped, with peel on.
1 stalk celery
salt
pepper
2 tablespoons neutral vegetable oil (I used peanut)
2 tablespoons sugar (more or less)
Shred the carrots. Put in bowl. Cut up the celery and put in bowl. Cut up the apple. Squeeze the lemon. Swish the apple up in the lemon juice, and add the sugar. Put the apple mixture in with the carrots. Add the oil, salt, and pepper. Cover, and refrigerate. (The apple will not get brown if you do the lemon juice treatment...the alternative is to use a Cortland apple, which do not oxidize brown).
Beet Salad
I had a beet salad at a catered work lunch, and I liked it so much, I was inspired to make my own.
Here's how. I adapted a recipe from the Craig Claiborne NY Times Cookbook, which I have had for years. My version was published in 1990. I use this cookbook a lot.
Boil around 2 pounds of beets whole. This will take around 4o minutes. Then, after they've cooled, peel and chop them. Peel 1/2 a red onion. Cut it into slices. Put the onion into the bowl. Add vinegar to taste, salt and pepper, and a little vegetable oil. Also, add some spices, such as clove or allspice. Chill and serve when chilled down.
Root vegetable salads seem perfect for this time of year. Not hot and hearty and long stewed, but...light and rooty.
Sunday, February 14, 2010
Croutons
Got a stale piece of bread? You've got croutons for two!
Here's how. Cube bread. Heat skillet.
Put bread cubes in skillet. Turn heat to high. Spray liberally (or not so much, depending on your mood) with Pam (non-stick cooking oil spray).
Turn heat to 'medium'. Add herbs of your choice. Tonight, for me, it was garlic powder and "herbs de provence", which is a blend of lavender, thyme, and other 'typique' herbs of southern France.
Saute, stirring frequently, keeping heat to medium (depending on your stove and its heat), until all sides of each piece of bread are browned or golden.
Et, c'est fini! That is it! You have croutons from that stale piece of bread you were thinking of tossing. Serve and smile.
Saturday, February 6, 2010
Morels
My sister, Leslie, brought me some dried Morels, from her last trip to France.
Tonight, Pork Chops were on the menu, Chez Cat Fur Studio. Actually, I was not supposed to be in town at all tonight. I was supposed to fly out to San Diego at 7:30 this morning. A surfing vacation for moi coming up, s'il vous plait!
But a big snowstorm has kept me homebound. In fact, my re-book, for tomorrow at 7:30, has also been cancelled, and now I'm to fly out at 2 PM, and through Phoenix (groan), adding 2 hours to my trip, so I will miss a get-together I've been anticipating for a while (double groan). But it looks like my 1 PM Monday surf lesson is still on. Un-groan. Double-yay!
SO. Cooking.
I'd been conserving the Morels for use at an auspicious time,which, I decided would be tonight. So, in typical conserving mode, I used only about six of the Morels, leaving plenty for a later use. After all, I OPENED the container. That was all I could do for today. Using some was enough...
The directions on the Morel container say to hydrate the morels in hot water for 20 minutes, and subsequently to put them in boiling water. These directions are en Francais, so I THINK that is what they said. So I did what I thought I should do, and I ended up with edible morels. I sliced them, and put them into my saute pan, in which I'd been frying some onions with bacon fat and salt and pepper. The onions were on low heat for almost one hour. I put in the morels, then added the morel soaking water, in which I'd dissolved about 2 tablespoons of flour. This made a nice bed onto which I perched each finished pork chop. On top of the chop, I put some "Frenchs" fried onions. From a can. The type we, who were children in the 1960s are used to seeing on on top of thanksgiving campbells green beans in mushroom soup. Not gourmet fried onions, but who cares. Pretty good is good enough for me, amidst 18 inches of snow.
The serving plate here shows just the main entree and the baked potato, before I placed the broccoli onto the plate. I served this with homemade bread and red wine.
Saturday, January 9, 2010
I want fries with that.
I have been hearing the praises of the "Care and Share" shop for quite some time. My parents love the place, and other friends visit often, too. I've been wanting to go there for quite some time. Today, my parents showed us where it is, and it lives up to its billing. What a fantastic place! I bought a Calphalon nonstick skillet, 13 inches, for $20. Brand new! I also got a plastic bag of rick rack, a hat, some pajama pants, two slips, and a small, 1 1/2 quart deep fryer.
French Fries for dinner! I have a humongous bag of beautiful potatoes from Costco, and two of them, fried up, would make a dinner for two, with a salad, I thought.
The last time I made french fries at home, I was 21 years old and in college. A bunch of us had come home late on a Saturday night (I guess it was really Sunday morning, to be technical), and I remember that I used my electric skillet, on a whim, to make fries. There were at least 10 of us in that kitchen, and I think we ate 10 pounds of potatoes. We kept frying and eating and frying and eating. I think we just cut the potatoes, and put them in hot oil. Did not think too much about it at the time. But then again, I don't think we were a discerning bunch.
So, tonight I consulted Mark Bittman's book on how to cook things, to find out how I should make french fries. Mark and Julia Child (and probably everyone who knows anything about cooking) say that you should peel the potato, then cut the fries, and soak them in cold water. During this time, the oil is heating up in the fryer. Both Mark and Julia say to drain the water from the potato, then fry the potatoes in 325 degree oil (or so), for about 10 minutes. They will be limp at that point, and still not brown. Take them out, drain the fries, let them rest, then put them in at a higher temp - 375 degrees, for a few more minutes, until they're brown.
So, I cut the potatoes, and made the sticks shorter, so they'd fit easily into my little fry basket. I soaked the potatoes in ice water, to get the starch off the surface. I put peanut oil into my fryer. I chose peanut oil because I know it tolerates high temperatures without breaking down, and I plan to re-use the oil after I'm done with it. I will filter it when it's cool, then store it.
One of my jobs during school was in a restaurant where they served a lot of fries. Every night, the fryer got drained, and the oil was filtered, then every week (I think Sunday night) the oil was thrown out and replaced. So that's how I know the 'basics' about deep-frying and oil, even though I have not deep fryed at home since I was 21.
After draining the water off, I lowered the fries into the hot oil using my basket. I ended up just frying the fries in one step, for about 13 minutes at 350 degrees. They turned out yummy, so I'm not complaining...but they were a bit soggy after a few minutes out of the oil. So next time I think I'll try it the Mark and Julia way and do them at a lower temp for a while, then let them rest, then finish them up in high heat.
For kicks, I cut a few potato chips and fried them up too. Not bad! A little thick, but next time I'll cut them thinner to get that perfect crispiness.
Subscribe to:
Posts (Atom)