Saturday, December 19, 2009

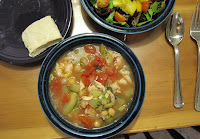
Snowstorm Soup


It's snowing buckets, and what better to make than a big pot of soup!

Potato and Sausage Soup
Barbara's Own Recipe

Ingredients
2 Tablespoons Bacon Fat (or Olive Oil if you're feeling virtuous)
1 teaspoon salt
1 large onion, chopped
2 cloves garlic, chopped fine
1 italian sausage, chopped
4 potatoes, peeled and chopped into 1 inch square pieces (approx)
1 1/2 quarts (approx) chicken broth
1 tablespoon thyme
1 teaspoon green pepper, ground
2 tablespoons flour (optional, for end)

Process
Saute the onion and garlic in the bacon fat, along with the salt, on medium heat. After about 5 minutes, add the sausage and thyme. Saute until sausage is done. When done, remove all from pot, and put aside.

Deglaze pan with chicken broth. Add all the chicken broth and the potatoes. Cook about 25 minutes on high heat, until potatoes are done. Add pepper.

Take about 3/4 the potato mixture (in batches) and put in blender. (Careful...it's hot!). Blend and put back into pot. Put about 1/2 the sausage and onion/garlic mixture in blender, too. Blend that and return to pot. If mixture still looks thin, take about 1/4 cup liquid, put into blender with 2 tablespoons flour and blend hard. Return all to soup pot, and heat to boil, but do not boil.

Call husband for din-din, ladle into dishes, and enjoy. Serves 4 hungry mungries or 6 normal people.

Sunday, November 8, 2009

Pears ... and Pie

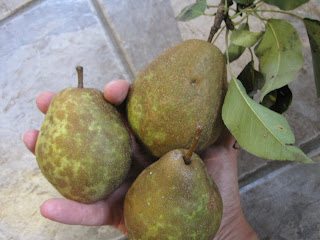
My parents gave me a 1/2 bushel of pears, because it's fruit harvest season, here on the east coast! You might remember that I also got a slew of apples. I've made apple crisp, apple pie, apple sauce, stewed apples, apple muffins...later, if I remember, I'll share the list.

But this is not about apples. It's about pears.

Last night, I made a pear and apple pie. For the first time in my life, I discovered the joy of making a pie crust using a food processor. The food processor that Nick and I have is a "Magimix", which we bought in 1986, while living in Germany. The Magimix is a ProtoCuisinart. Ours is a 220 volter, made for Europe, and it's fully equipped with a recipe book "en Francais, s'il vous plait"! And I still use this Magimix, over 20 years later.

I used it to make the crust.

2 cups flour
1 teaspoon salt
1 tablespoon sugar
1 stick butter
2 tablespoons crisco

put all this in the food processor, with the metal blade, and pulse about 6 times.

Then, add about 1/2 cup water, iced. Pulse again, a few times, and there is a beautiful, hands-free pie crust dough! This recipe is adapted from Julia Child.

I put it in the refrigerator for 1/2 hour before rolling it out.

This pie...only took half the above recipe, as I put a crumb crust on top, decorated, of course with an apple cutout, drawn freehand. The remainder is in the refrigerator, for later use. Pie crust, if wrapped well, will keep for weeks at a time. I learned this from the Pillsbury people, who sell 'ready made' pie crust in the grocery store. I don't buy that very often...and after discovering the joys of food processor dough, I won't in the future, at all!

After baked, this dough was light, crispy, and perfect for a fruit pie.

So, for inquiring minds, here's what I did for the filling:

6 cups more or less of mixed pears and apples, cored, peeled, and sliced
1 tablespoon cinnamon
1/2 tsp nutmeg
1/2 cup sugar
2 tablespoons flour
1 tablespoon lemon juice
1/2 cup flour

Mix the above all together, and put in the rolled out pie crust.

Top with crumb topping:

1/2 cup flour
1/2 cup oats
1/2 cup brown sugar
1 tablespoon cinnamon
mix in 2 tablespoons butter until crumbly

Bake at 350 degrees F. until done. This is when the crust looks crisp, the pie is bubbling, and your nose...well...it just "knows"...that the baking is done.

The pie you see is ready for transport to a friend's house for dinner! We served it with homemade ice cream.

Sunday, November 1, 2009

Bird Food

Really! Food for birds.

I had about 3/4 cup of bacon fat, collected over the past month or two. Nick and I don't eat bacon that much, and I mostly use it as a flavoring. But I save the grease, and sometimes use it in cooking. Bacon grease makes a fantastic medium in which to fry potatoes.

But I try not to eat animal fat too often, so inspired by the bacon fat in my refrigerator, and by the knowledge that winter is coming, I decided to use the fat to make some suet for birdfeeding. As I write this, the finished product is cooling, and not yet served to the birds. I have high hopes that this offering to the birds will be well received by them, thus you're hearing about it now. In the unlikely event the birds to not like my offering, I'll comment to this post later.

Nick is faithful in feeding the birds. Every morning in late autumn through early spring, right after making coffee, Nick goes outside to stock the feeders. He does this no matter what the weather. In the middle of a snowstorm, he clears off the feeders, and creates a clean space on the deck, putting birdseed down. This is typical of Nick - he loves the birds - and is one of the many things I love about my dear husband. We feed the birds every day in winter with a mixture of suet (especially for the insect eater types), sunflower seeds, and millet mixture. In summer, we taper off, feeding them just a small portion of seeds only - no suet. We understand from the people who are paid to know these things, ( and intuitively this makes sense) that birds need to learn how to forage for themselves, and the way to do that is to limit 'free' food in the seasons during which their natural food (insects, grubs, seeds, or whatever each species likes to eat) is most available. Lots of birds choose our yard in which to raise their families, so it is very important to us that the young ones learn that the feeder is not the only place to find food!

We're lucky in that we live on a 2 acre lot, and the houses are pretty far apart here. Our yard is neat, but not manicured. We don't fertilize our grass. We don't use pesticides. Our lawn looks pretty good. Happily, we do not live in one of those hypergroomed "mcMansion" type neighborhoods, in which everyone "has" to have a monoculture green grass lawn or risk social ostracization. Our neighborhood has a variety of people living in it - from 'first original owners' to young families. Our home was built in 1948.

Our lawn is a mixture of what grows there naturally and survives not getting watered, and getting its head chopped off by the lawnmower every few weeks. So really, we live on kind of a bird sanctuary, since much of our lot is filed with forest 'edge' type growth. Bushes, evergreens, and a mixture of small and tall deciduous trees, with some open patches of grass and low growing plants. We get around 35 inches of rain here annually, so the growth is lush. Birds love it here. We have counted over 65 species since we've lived here.

So let's get to the good stuff, shall we? A quick internet search yielded a recipe for peanut butter suet. I used this as my base, but departed quite radically. Here's what I did.


Melt: 1 pound of chunky peanut butter, along with
3/4 cup of bacon fat and
1/2 cup of crisco.


I figured the crisco, as a hydrogenated vegetable fat, along with the peanut butter, which are both solid at room temperature, would work to hold the mass together.

Next, I took the pot off the stove. Then I stirred in:
1 cup raisins
2 cups cornmeal
1 cup sunflower seeds
2 cups millet birdfood mix
1 cup wheat gluten, and
3 cups of rye flour.
Finally, I tossed in about 1/2 cup of bulghur wheat.

The raisins, the rye flour, the bulghur and the wheat gluten were all geriatric - been sitting in my cabinet who-knows-how long! I needed the gluten, I knew, because the rye and the corn have hardly any natural gluten, so something needed to hold the grains together.


After mixing the above, I added about 1 1/2 cup water. (Not sure exactly how much.) I added enough so that the texture was correct.

I kneaded this a few minutes, then molded it into a plastic square, which was the container in which some commercial suet had come.


I made several squares, and they're cooling and drying slightly on the table. Once they're dry, I'll package them up for this winter's bird feeding.


I think the birds are going to like this, because when I was mixing the ingredients, Nick came in the kitchen and told me how good this stuff smelled. It did smell good. Kind of like a natural foods fanatic's version of a peanut butter cookie!

Looks like I made this stuff just in time, because the first junco of the season arrived at our birdfeeder this morning.

Sunday, October 25, 2009

Chicken Marengo, In A Fashion


23 years ago, Nick and I were living in Germany. That' s the Federal Republic of Germany, aka Western Germany, as it was known back in the 80s.

I hosted an important work dinner, and I served Chicken Marengo, using a recipe from Jeff Smith, The Frugal Gourmet. This was prior to the scandal that derailed his public TV cooking career.

At the dinner, were my boss, Major Livingston, his wife, Cheryl, my co-worker, Captain Dennis Barletta and his wife, and Elke Dressler, the Third Infantry Division Protocol Officer. Manohmanischewitz, was I a nervous wreck. I didn't know what to play for music, so I left on one of the classical Bavarian music stations (we were stationed in Wurzburg, Germany). It so happened, that the radio station was playing lots of Strauss that night. Elke, who was a worldy - or, should I say, world weary, said, with a critical edge to her voice"What, is this Strauss Rememberance Night?". At that time, I was not good with comeback repartee, so I just smiled and drank another glass of Barolo. And I was happy that everyone ate their chicken peacefully and seemingly, gratefully.

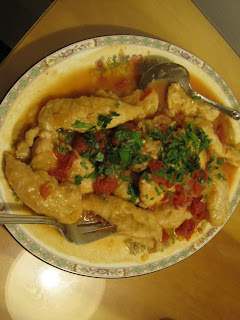
Tonight, I served another version of Chicken Marengo. This version is all mine, for sure. Using the pressure cooker!

Instructions:

  • Dredge 1 1/2 pounds boneless, skinless chicken breasts in flour, salt, and pepper. Brown in 2 tablespoons olive oil. Take out of the pot.
  • Brown 1 onion, chopped,and 2 cloves garlic. Add 1 16 oz. can chopped tomatoes. Put the chicken on top.
  • Add 1/2 cup dry white wine, and 1/2 cup chicken broth. Then add 5 springs parsley, some celery tops, and a bay leaf.
  • Cook at 5 pounds pressure for 10 minutes.
  • Take off the stove, and let sit for 10 minutes more.
  • Chop some parsley.
  • Put the chicken on a platter, discarding the bay leaf, the celery, and the parsley.
  • Put the newly chopped parsley on top.

Serve with mashed patatoes and steamed brocolli.

And this time, if only in my mind...When Fraulein Dressler says, "Is it Strauss Remembrance Night??", with that critical edge to her voice, I'll reply "Yepper...and next you're gonna hear Wagner. Followed by the Skorpions".

With age does come wisdom. Yeah, yeah, I'm over it. Finally. Now.

Saturday, October 24, 2009

Herb Layered Foccacia


I collect cookbooks. I read cookbooks in bed before going to sleep at night. There is something comforting and relaxing about reading cookbooks. A favorite genre is baking. Nick gave me this book, Rose Levy Berenbaum's "The Bread Bible". It is one of those cookbooks that tells you now just 'how', but 'why'. It reads almost like an illustrated textbook.

Yesterday, I had the chance to bake some bread. Why I haven't featured that particular activity yet here, I have no idea. Well, it's time to correct that oversight! I cook bread because I like to eat bread. Same as sewing. I like clothes, so I sew.

For me, and I guess for most cooks - there are two types of cooking and baking. There is 'craft' cooking, and there is "utilitarian" cooking. The craft type is when I immerse myself in the process, enjoying the journey as well as the finished result. The utilitarian type is what I do most of the time. It's "get it on the table" cooking. The satisfaction of whipping something decent (and, at my best...great...) out of what we have - and doing it in 20 minutes - that's satisfying! But that said, what I did here was what I would call craft cooking. I had to pay attention to the deliberate process.

I used Berenbaum's focaccia recipe, but I tweaked her method. Her method uses a hand mixing and kneading. But I used my KitchenAid mixer. The one I have is the "professional" model. I had the artisan model, with a smaller motor, but I burned that one out a year ago, when I was using it to knead some sturdy whole wheat bread. So I bought a big boy model.

This dough is very very wet, and when making foccacia, the hardest thing for me is to let it be wet. Because it should be wet. The proportion of flour to water in this bread is 2 cups flour to 1 cup water. That's 1/3 wetter than my normal 'knock it together' pizza dough! But I was disciplined and did not add too much flour.

After a series of rises and gentle punch downs, my dough was velvety soft, full of air, and tender. So I rolled it out, so that a third of the dough was thin, and the rest was thick. In the middle, between the dough layers, before sealing it for the final rise, I put fresh herbs. Our garden still has some herbs growing in it, despite the recent frost here where I live, on the east coast of the US. The only herb that is pretty much decimated is the green basil. My purple basil, for some reason, is hardier. So, after letting my bread rise, in went the herbs.

I had an appointment, so when I came back, two hours later, this is what I had. I punched dimples in the bread, drizzled it with olive oil and salt, then baked at 400 degrees....

Bread with a hearty red wine. A classic and 'can't go wrong' combo. In this case, it was a Spanish wine. Spanish wines are a favorite of mine, because they deliver some good complexity for a reasonable price, in many cases. This bread was s0000 good that we almost finished the loaf - just the two of us, at dinner last night. And after that, I had some as a snack.

Wednesday, October 14, 2009

Apple Fest Continues


Nothing against Mott's, but my sauce is way better. Why? Well, it's mine, first of all. Second, the apples are hand selected, then simmered in their peels with a lemon. Zest and juice. Finally, using the old food mill that belonged to my Great Grandmother Alice, a very smooth, fine grained sauce is created. Mixed with a very small amount of vanilla and cinnamon (not discernable taste wise, but enough to make the flavors of the apples sing), then, if needed up to a 1/4 cup of sugar (for a 1/2 gallon of finished sauce). That is it, and oh, how yumilicious. I freeze it in 2 cup baggies, and it will be there, waiting for mid-winter enjoyment.

Saturday, October 10, 2009

Apple Pancakes


I've been busy, busy with all the apples I got recently from my parents' tree. Here is a simple example of how I've been using the apple bounty:

Apple pancakes. Use any pancake recipe, and as the pancakes cook, slip in 1/8 inch slices of peeled, cored, apples. That's it. If you're feeling adventurous, add an apple compote instead of maple syrup. More to come!

Monday, September 28, 2009

Old Fashioned Microwaved Oatmeal

Old Fashioned? Yes. Microwaved? Certainly. So, it's old fashioned, microwaved oatmeal. For one person. Hearty, heart-healthy, and guaranteed to get you through the morning. Ready? Here's how.

Into a large microwave safe bowl, put:
  • 1/3 cup old fashioned rolled oats (don't bother with that quick cooking stuff - it's pustulent!)
  • 2/3 cup water
  • 1 small to medium apple - peeled, cored, and thinly sliced - less than 1/8 inch thick slices. any thicker, and the apple won't cook!
  • a dash each of salt, cinnamon, and freshly grated nutmeg (not too much of any...you don't really want to taste the spices. you just want them to enhance your apple)

Microwave the above at 2 minutes on "high". let rest for 10 seconds, stir, then let sit for one minute.

Microwave again on "high" for 3 minutes.

Stir in a few tablespoons sugar, honey, or whatever is your sweetener of choice. Mine is Splenda. Three packs. Not old fashioned, but I like it. Stir well. Put into a serving bowl. Top with a 'wafer-thin' sliver of butter, and put milk on top. Serve hot and steaming, and think 'gratitude' for apples in all their autumn glory!

Saturday, September 26, 2009

It's Apple Festival Time!


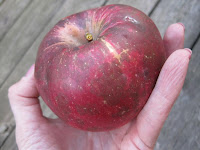
The house in which I grew up is still owned by my parents. They have always had venerable apple trees growing in the front yard. All the old trees I remember when I was a child have died (they were 40 years old, or so, in the early '70s, and the last of the old giants died around 5 years ago). But my parents had the foresight to plant some new trees. Yesterday, I paid a visit to the old homestead (we call it "51", after the street address) and picked these.

These apples taste of hometown -they have essence of childhood terroir. For that reason they're special enough. But it just so happens that anyone who tastes these apples fall in love. They are truly outstanding apples. I'm not sure what variety they are. They kind of look like Cortland, and their flesh is crisp and holds its shape in pies, but the flesh oxidizes quickly when cut, so that is not it.

Whatever variety they are, it's apple festival time around here. Soon, I'll post pics of apple pancakes, baked apple slices, applesauce, and right now, I'm working on apple juice (never did that before and I'm curious). Tarte tatin and more...coming right up!

Monday, September 21, 2009

Vertical Integration


Vertical Integration - if you've been within a few hundred yards of business school you know this term. In this case, a fancy -schmancy way to say we're growing, preparing, cooking, and serving the food you see here.

My mom has grown vegetables in the family back yard for a long time. One of my summer jobs, when I was 16, was close enough to the house that I could drive home at lunchtime. I would come home, eat lunch, and help my mom pick green beans. I don't remember what I ate for lunch, but I remember picking those green beans, knowing we were going to enjoy them that evening. With the sun on my back, my mom, and our little dog, "Whiskey", snuffing 'round our heels all the while. Mip, our orange tiger cat, also known as "Mr. Soob", was probably somewhere around too, but he was a hunterly type when he was outside, and didn't want much to do with me except when he was sleeping on my bed. Split personality, that Mip.

So my mom has been growing vegetables almost her entire life, and this year, my dad got in on it too (other than rototilling and helping my mom, he was never that into planting and harvesting...until now.) At the shore, this year, my dad went on a root vegetable kick. Potatoes and carrots! I added some tomatoes and pepper plants. The soil at the shore is beautifully sandy. Perfect for growing root vegetables.

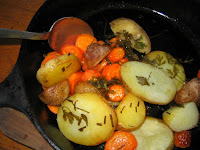
Yesterday, Nick and I went on a 11 mile kayak trip, and we were gone all day, so quickly, it was time for dinner. So I went out back to the vegetable patch, and dug up these.

The potatoes are divine. Thin skinned. Floury. Taste like good New Jersey sand. In all the best ways. The carrots are a little long in the tooth, so we can not eat them raw. But cooked. That's another story. So I peeled and sliced the carrots and potatoes, parboiled them in salted water... then drained them, put them in a well buttered pan (we call this skillet the 'artery' pan) with some parsley, thyme, and chives, also from the garden. Baked at 375 for about 30 minutes. Sweet, root vegetable goodness.

Meanwhile, I did a sliced cherry tomato salad with basil. Dressed with salt, pepper, red wine vinegar (would have used balsamic, but we didn't have any) and a little oil.

With a turkey burger from the grill, Nick and I had a stylin' din-din. After all, we'd earned it!

Wednesday, September 16, 2009

Real Men Do Eat...


Quiche.

This morning, I prepared and baked a pie shell - a pate brisee- 1 1/2 cup flour, about 1/2 stick butter, salt, a bit of sugar, and some ice-water.

In a separate bowl, I beat three eggs, mixed in 1 1/2 cups mixed cream and milk, a pinch of nutmeg, pepper, and then added 1/4 cup shredded parmesan cheese and 1/4 cup muenster cheese. I put the mixture in the refrigerator, where it stayed all day. I asked Nick (who gets home from work before me) to pour the mixture into the pie shell, dot the top with some butter, and bake same at 375 degrees for 30 to 35 minutes.

Nick made a salad and got some good bread out of the freezer (when I bake bread, I bake lots and freeze it). This bread, however, came from Costco - we buy it in two loaf quantities, cut each loaf in half, and then freeze the halves.

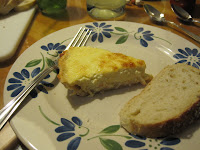
Nick picked me up from the train station. A half a loaf of bread, a salad, and the quiche, along with a glass of unoaked domestic chardonnay, made a grand dinner. We ate half the quiche tonight, and will eat half tomorrow. It reheats nicely. I always try to make two or even three dinners at once, when I cook on weeknights.

Tuesday, September 15, 2009

Mint Jelly


I cranked out four jars of mint jelly this evening after work. First, I went out to the garden, where Nick and I have a huge mint patch growing. We have spearmint, peppermint, and apple mint. All our mint is grown from cuttings I got from my mom over 15 years ago. I had not intended to propagate the mint; it was sitting for a week in a glass of water in our sunny kitchen windowsill. It sprouted roots, so I planted it. Our mint patch is now five square feet in area - it's pinned between the lawn, the sidewalk, and the edging. I often wonder why the entire earth is not covered in mint, that plant spreads so prolifically. Once upon a time, I did what any thinking gardener would do. I had my mint growing inside a bottomed-out five gallon bucket. It grew nicely there - civilized and contained. Until one day, I turned my back. It jumped the sides, and now instead of a few tame mint plants, I have a mint field. So tonight, I picked .0001% of my mint field, then brought the leaves into the house, where I sorted and washed them.

I had inadvertently brought inside a pillbug who had been enjoying the mint; I found him (or her) in the sink. I transported the bug back outside, so he could live out his (it is hoped) future peaceful life. Imagine the alien abduction stories this bug could tell it's mates ..."you would not BELIEVE this..I was eating dinner. All of a sudden, I was 6 feet in the air. I ended up under blinding lights, my body sprawled out on this white thing - it was huge and hard. I lost my mouthful of mint. Huge floods of water came rushing down onto me. I almost drowned. Just when I thought I was a goner, I was lifted up, and here I am, like it never happened. Joe, I'm tellin' ya. Aliens are REAL!"

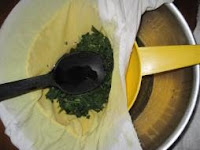
I chopped the mint, and made a strong mint infusion by steeping it in boiling water. I squeezed out the infusion, using a self-invented contraption of colander combined with an old clean t-shirt from Nick (I was supposed to use cheesecloth, but the t-shirt was cheaper.) Combined 1 3/4 cups of this infusion with 2 tablespoons lemon juice, three and a half cups of sugar, boiled it, then added the liquid pectin. Brought to a boil, for one minute, and there I had it! Well, not actually, it was not green enough for me, so I added 2 drops of green food coloring. Here is lots more info on home preserving, if you're interested.

I poured my jelly into my prepared jars, then, for good measure, treated my jars to a boiling water bath. When making jellies or jams, you can get away with just using the 'hot pack' method, but I like to be doubly sure that all the little microbes are dead as doornails, so I use the boiling water bath. The jars are cooling in the kitchen right now. This whole process took me only one hour. Nick and I tasted a bit of the extra jelly, and it is good, for sure. I think I might try this next using some of the basil in our garden. I always make lots of pesto and freeze it, but maybe some basil jelly will be welcome in the snows of January to come. I bet that would taste pretty good? Basil jelly?

Sunday, September 13, 2009

Une Omelette Baveuse


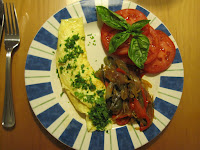
Nick and I got back this evening from the shore past our normal dinnertime of 6:30/ 7 pm. Having been on the bay all day, kayaking, we were rockin' the hunger. It was so late, and we were hungry. So, for dinner, we had an omelet. I cooked it in the Julia Child tradition. A bit runny in the middle, and therefore, light and luscious. Or should I say, "baveuse". Anyway, I put some shredded cheddar cheese inside this omelet and served it with biscuits (not shown) and sauteed onions and peppers. A beautiful sliced tomato with basil on the side.

Saturday, September 12, 2009

Easy, Creamy Clam Chowder


Simple Creamy Clam Chowder

I made this today for lunch - a cloudy, rainy day here on the eastern seaboard (of the US).

Here's how I did it:
  • heat 2 tablespoons peanut oil on medium-high heat, in a heavy kettle, stovetop.
  • saute 1 chopped carrot, 1 chopped celery rib, one onion, chopped, for about 5 minutes until onion is golden, not brown.
  • add 2 cups fish stock and 2 tablespoons each chopped basil and parsley.simmer this for a few minutes.
  • 3 minutes before serving, turn heat to low.
  • then add 10 clams, chopped, with their juice.
  • immediately before serving, add 1/2 cup heavy cream.
Serve with french bread, spread with salted butter.

And I'll leave you with this. It's been a few short weeks since the heat of summer was still upon us, and with it, this skipper, enjoying his (or her) pollen repast. Thanks to Nick for this beautiful parting shot.

Sunday, September 6, 2009

Clam Spaghetti


This time of year, on the New Jersey coastline, the warm waters of Barnegat Bay contrast with newly-crisp morning air, and brisk breezes whip frothy whitecaps into the water surface.

Nestled in their mud and sand homes live clams. My family loves clams. I think it's genetic, because I love clams too. Nick, to whom I've been married for almost 25 years, has come to tolerate clams. He will eat them, but he does not love clams. I love the scientific name of clams - Mercenaria mercenaria. This name references their role as "money". The first Americans (pre-European invasion) traded in clams, as food (dried) and used their shells, which are beautiful purple, white and gold, inside, as a form of money.

Clams are precious. So humble, simple, living in sand and mud, under the surface of the bay. Biologically, clams have changed little since the Cretaceous period. Fossils exist of creatures which are largely similar to our modern Mercenaria mercenaria.

Clams were initially scorned by early European immigrants to the United States as 'low' food. Northern Europeans deemed clams suitable only for eating by the lower classes. Now, clams are appreciated as a culinary delicacy by many, most certainly, members of my family. My mom and dad make clam patties, clam fritters, clam chowder, clam spaghetti, and my dad makes a killer 'clam egg'. When my parents go on trips, they take two clam rakes with them, they like clams so much.

I have read that clams move no more than 4 inches in their lifetimes. Well, silly me, why should that surprise me? They have a foot, but no legs. Clams stay buried in the mud, siphons up, filtering the smallest sea creatures and synthesizing the plankton into my lovely, sweet, edible nuggets of culinary delight - clams. This time of year, in September, the clams we dig from Barnegat Bay are more luscious than at any time of year. They're fattened up from all that rich plankton which forms in the warmth of the summer.

Warm is good, to a point. The clams seem to like it, but some other creatures who share the bay don't. Blue crabs are not happy when the water gets too warm, because their breathing apparatus is similar to that of insects - kind of a passive oxygen transfer system. Warm water holds less oxygen. Crabs need lots of available oxygen in the water, or they suffocate. Earlier this summer, there was a huge crab kill on Barnegat Bay. The water was so warm, the oxygen levels were depleted below the crabs' tolerance. The water is cooler now, and there are crabs in the bay again. I guess the new crabs must have come from other areas - through the inlet (from the ocean) or from neighboring bays.

Like many bodies of water, Barnegat Bay is getting warmer, due to development and in part due to the existence of Oyster Creek power station. Oyster Creek uses the waters of the bay to cool its reactor, sucking in and out 10 times the volume of the bay each year. Oyster Creek has been around since the 1960s, and is not the sole reason that the Bay is warming. A combination of nitrogen runoff (causing algae bloom), and other development pressures, along with Oyster Creek, makes the Bay warmer. The public loves water, and I love clams. We need to keep working together to preserve our ecosystems, including the Bay. Progress is being made - things look better for the environmental future than they did in the 1970s for sure. So, on to clam spaghetti.

We dug the clams used for clam spaghetti a day before we used them. After digging the clams, we hang them in a basket, suspended off the side of the dock, so that they're dangling in the bay, in clean water. So, the clams continue eating, but they expel the grit that they normally have inside them, because they're not living in sand and mud anymore. If I lived 1 inch below sand and mud, I'd be full of grit, too. Once the clams have cleaned themselves, it's time to bring them in for the harvest.

No surprise - you've got to open the clams to start making clam spaghetti. Clams are easier to open if they are cold. My parents taught me to chill them down in the freezer for about 15 minutes. The clams get sleepy in the freezer and are less resistant to being opened. The clams, being living beings, don't want to die. I don't blame them, so I try to make it as easy for them as I can. So the freezer is a primitive form of anesthesia. You get the clams sleepy from the freezer, then open the clams by taking a knife, inserting it in the side front of the clam, then sweeping the knife inside the clam, to sever the muscle that holds it closed. Once you have done that, the clam gives up, and you scrape it from its shell.

I was cooking to feed five people, so I used 30 clams in this recipe- medium to large sized. The large "honkers", I reserve for clam chowder, but you can use them if you want. I save the smaller clams (1 1/2 inch to 2 inch) for eating raw on the half shell, or to steam. Next, take 2 cloves of garlic, or as much as you want, if you're a garlic lover, and cook (don't brown) in 1/2 stick of butter. I used unsalted, but if all you have is salted, use it. (Use less butter, if you're making a smaller quantity - remember I was cooking to feed five adults). Soften the garlic, stirring constantly, in the pan. Remember, do not brown the garlic! Last night, when we made this dish, my sister Leslie stirred the butter and garlic for over 10 minutes, only to have me come into the kitchen, turn the heat up, and burn the garlic. We had to dump it out and start over again. Learn from my mistake -go gently with the heat, and you'll not burn the garlic.

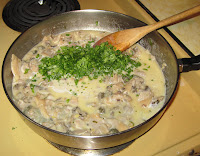
Meanwhile, drain most of the liquid from the clams, then chop the clams. (Do not grind them). I used a pair of old kitchen shears for this job. You can reserve the clam juice, if you want, for another use. Be aware that the clam juice is very salty (as are the clams...but the juice has a LOT of seawater in it). You're going to put the clams in at the very end, just as your pasta has 3 minutes to go. Because you do not want to cook the clams hard. You want to only warm the clams and turn them from translucent to cooked, right before serving. If you cook the clams hard, you'll end up with little rubber bands, not clams.

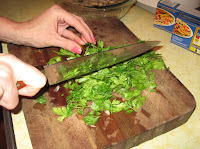
Chop your parsley. This is my sister, Leslie's hand at the beginning of her chopping sequence. The parsley was from my mom's beautiful shore garden, which includes assorted herbs, marigolds, phlox, cosmos, zinnias, and such. The garden is right outside the back door, on the way to the dock.
Right when your pasta is finishing up, around at the three-minutes-to-go mark, add your chopped clams, and cook for about 2 minutes. Then, add some heavy cream. Not much - just enough to smooth it out. For five people, I used 1/2 cup. Then, add the chopped parsley, and...if you have it, about 2 ounces good quality white wine (we used a nice unoaked chardonnay).Stir, warm, and you are ready to mix it with your drained, cooked pasta. Mix the pasta and the clam mixture well, tossing to cover all the noodles. Reserve some of the clam mixture to put on top of your finished dish, before serving, for appearance's sake.
Many people make clam spaghetti using olive oil, instead of butter and cream. I like the butter and cream more than olive oil, as these seem to 'soften' and complement the flavor of the clams. Use some pepper on the final dish. You won't need salt.

Thanks to Mary and Leslie for culinary assistance and photographic documentation!

Saturday, August 22, 2009

Country Style Chicken Soup - Or What I Do With A Leftover Rotisserie Chicken

When Nick and I buy a rotisserie chicken, we get at least five meals from it. The first night, we play primal caveman. We take a drumstick or thigh, and a few slices from the bird. That first night is always the best. On days two and three, we cut successive slices from the beast, usually eating it with my homemade bread, or potatoes, and always a salad. On day four, it's chicken soup time.

My chicken soup varies with my mood, but it always starts like this. Pick the remaining meat off the carcass and reserve. Meanwhile, sweat some onions (mandatory), and, possibly celery, green pepper, carrot (depending on mood). Then crush and toss in some garlic (or not). Take the bones of the carcass, from which most of the meat is stripped, and separate them, so that they will lie in the bottom of the kettle, and will be totally immersed in 2 or 3 inches of water. Add the bones, the water, and various herbs (I used whole fresh ones from the garden in summer, which I later remove, a la bouquet garni). The herbs I used today were rosemary, parsley, and thyme.

Simmer (don't boil) for about 1 hour. Remove the bones and the herbs. Discard the herbs. Scour the bones for any remaining meat, and return the meat to the pot.

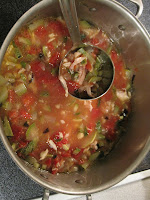
Now, is when I can get creative. Today, we picked a zucchini from the garden. That, and my love of basil, made me think, "summery provencal style". So I added the squash and some chopped tomatoes and 2 cups of cooked garbanzo beans. (I cook beans in quantity and keep them in 2 cup portions in my freezer). I simmered about 15 minutes more, then I added some chopped basil, and finally, the reserved meat from the chicken, which I chopped up before adding to the pot.

We had this tonight, and have enough left over to have again on Monday (a worknight, when cooking time is nonexistent). I love when I can do two meals in one!

I served the soup salad and Ruhlman's "3-1-2" biscuits, which, for just Nick and me, was 1 cup flour, a few tablespoons butter, 1 t. baking powder, salt, and enough milk to make it stick together.

Friday, August 21, 2009

Clams, A Whole Army of Them!

One of my family's favorite things to do is go clamming on Barnegat Bay. I always bring some home. Nick, my husband, being a midwesterner, took many years of marriage to me, but eventually go so he's willing to eat clams. So, after work today, I made us some clam fritters.
I used this recipe, as I didn't want to delve through all my cookbooks to find a suitable one. This one was light on flour, and it turned out to be a good thing. The key is to pour the liquid into very hot oil. Yumilicious.

Tuesday, August 18, 2009

Peach Jam


When I was little, my mom would buy peaches by the 1/2 bushel, and can them. She used my Grammy Alice's old canning kettle, and quart-sized Ball canning jars. I remember playing with the circular canning lids while sitting on the floor, where the living room met the kitchen, watching my mom skin the peaches, prepare the simple syrup, cook it all, then ladle it into the hot clean jars, after which they'd go into the canning (sterilizing) kettle. When they were done, she'd lift them out with a stainless steel cage, into which each jar nestled.

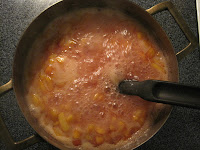
I've channeled this heritage by making peach jam this evening. Sometimes, I crave the instantaneous results that such efforts yield. I have seven jars of peach goodness, after 1 hours work tonight.

This recipe is simple - 5 cups of peeled, chopped peaches, 1 box of granular pectin, 5 cups of sugar, 2 tablespoons lemon juice. Boil. Ladle into jars. Process jars in boiling water 10 minutes. And there you have it - holiday gifts ready for the packing. If they make it until then! I sneaked a few spoonfuls of this, and it is mmm, mmm, good!
Monday, August 17, 2009

Impromptu Salad Bar


This is about taking what you have, and making dinner from it!

On the upper left, there are tomatoes from my garden. Romas, cut up, along with Sweet 100 cherries, and yellow pear tomatoes. On the lower right, is a hot pepper. Cucumbers, sweet peppers, and red onions complete the palette.

Nick's coming home soon, bearing, it is hoped, a rotisserie chicken. That, field greens, the veggies above, and bread, make a balanced meal at our house! .

Sunday, August 16, 2009

Fish Stock!

A few weeks ago, Michael Pollan put an article in the New York Times Magazine. I like Michael Pollan's work, and find it informative and thought provoking. I recommend his book, The Omnivore's Dilemma, to you, if you've not already read it. In the New York Times article, Pollan states that many of us don't cook anymore, except to heat things up - things like pre-packaged food. Interestingly, he notes the concurrent proliferation of armchair cooking - that Americans love to watch TV shows about cooking - shows like "Iron Chef". But that these shows are entertainment. They don't seek to teach us how to cook, as Julia Child did, in her PBS show of the 60s/70s. (I remember watching that show with my mom - I reacted the same way many others did - I was inspired that I, too, can cook! I figured, all I need is a sense of adventure and some ingredients. The worst thing that would happen is what I create is inedible - hardly a tragedy. And, since I started cooking for myself and my college friends in the 1980s, I've not had too many total, irreperable failures in the kitchen. That inspiration came from Julia. And it also came from my dad - who showed me from the time I was four years old, I could do pretty much anything I wanted. Of course, my dad's idea of adventure was me cutting the grass, putting up insulation, and cleaning the cars. But he also spent the entire summer of 1968 teaching me to water ski. He taught me to sail. He taught me to change the tire and oil on my 1972 Ford Pinto - I had to learn those things before I was allowed to drive. What with all that hard work, he gave me a pretty strong work ethic from that...and confidence. He was the toughest boss I've ever had. And that includes U.S. Army bosses, restaurant bosses, lawyer bosses, and on and on. None are ever even half as tough as dad was. When I told him that once, he shrugged it off - I don't think he believed me! I'll tell you about my mom later - she was just as influential, in different ways, to me and my two sisters as we were growing up.

Speaking of my dad - he caught some flounder yesterday, and saved me the bones. I have recently become enamored of the book, Ratio, by Michael Ruhlman. In this book, Ruhlman instructs us how to think about cooking. Not to think 'recipe', but to think logic, and ratio. I've been doing that, more or less, for over 25 years - I've never been one for following recipes. I use recipes as a base from which to riff my own food. Ruhlman's book takes my ideas much farther. He says that pretty much all cooking is based on basic ratios. Take bread. It's 5 parts flour (by weight) to 3 parts water. Then add yeast, salt, and so on. If you use the 3:5 ratio for bread, you'll get decent bread. It might not be earth shatteringly delicious, but it will be good. That's the basic idea behind the book. There's more, but you'll have to look at the book for yourself, because I want to move on to what I cooked today.

Stock. From the flounder bones my dad gave me.

Here's basically what I did to make fish stock:
Chop coarsely some onion and celery. Put in kettle with a little oil. "Sweat" the vegetables (on medium heat, with lid on) for about 5 to 10 minutes. Do not brown them.
Meanwhile, soak the fish bones in very cold water. (See below for a photo of my bones. My FISH bones, silly. Not mine.) Change the water a few times. This gets the blood out.
Drain the fish bones (after offering a bit of sushi to the cat), and add them to the vegetables. "Sweat" the bones with the vegetables for about 5 minutes. Then add water and other herbs (I used parsley and thyme, and a bay leaf, with one leaf of sage). Bring to just under a simmer. Don't boil. Cook on low heat for 30 minutes. Cool, and strain. Salt to taste. (If you wanted you could leave the fish bits and vegetables in there, you could...especially if making a fish stew... But I discarded my bone scraps since most of the nutrition and flavor has been leached out by the water.). Pretty darn tasty stock! I'm going to freeze my stock in 2 cup portions, and use it to cook rice, as a base for soup, to enrich my clam chowder, and so on.